
Learning how to make a bow for a “wow” presentation is easy if you know the techniques. As with anything practice helps. There is no one right way or one method to make a beautiful bow. I suggest that you try as many different methods as you can find and then choose the one that is most comfortable for you to use.
Here are some tips to make that bow extra special as well as a detailed lesson in one method.
- Using different widths of ribbon as well as ribbons with different textures can create a unique bow.
- You can also use print cello behind a bow or create two different size bows and attach the smaller one over the larger one.
- For a quick upgraded look to a pull bow, create a larger bow with two to four loops to go behind the pull bow.
- You can also add other items to the top of a bow to help theme the bow– such as a blower to a birthday bow.
- If you don’t own a “bowdabra” buy one. It is cheap and makes bow-making so much easier. I use mine for every bow that I make. I’m sure that many of you have other tips for making beautiful bows so please share them in the comments.
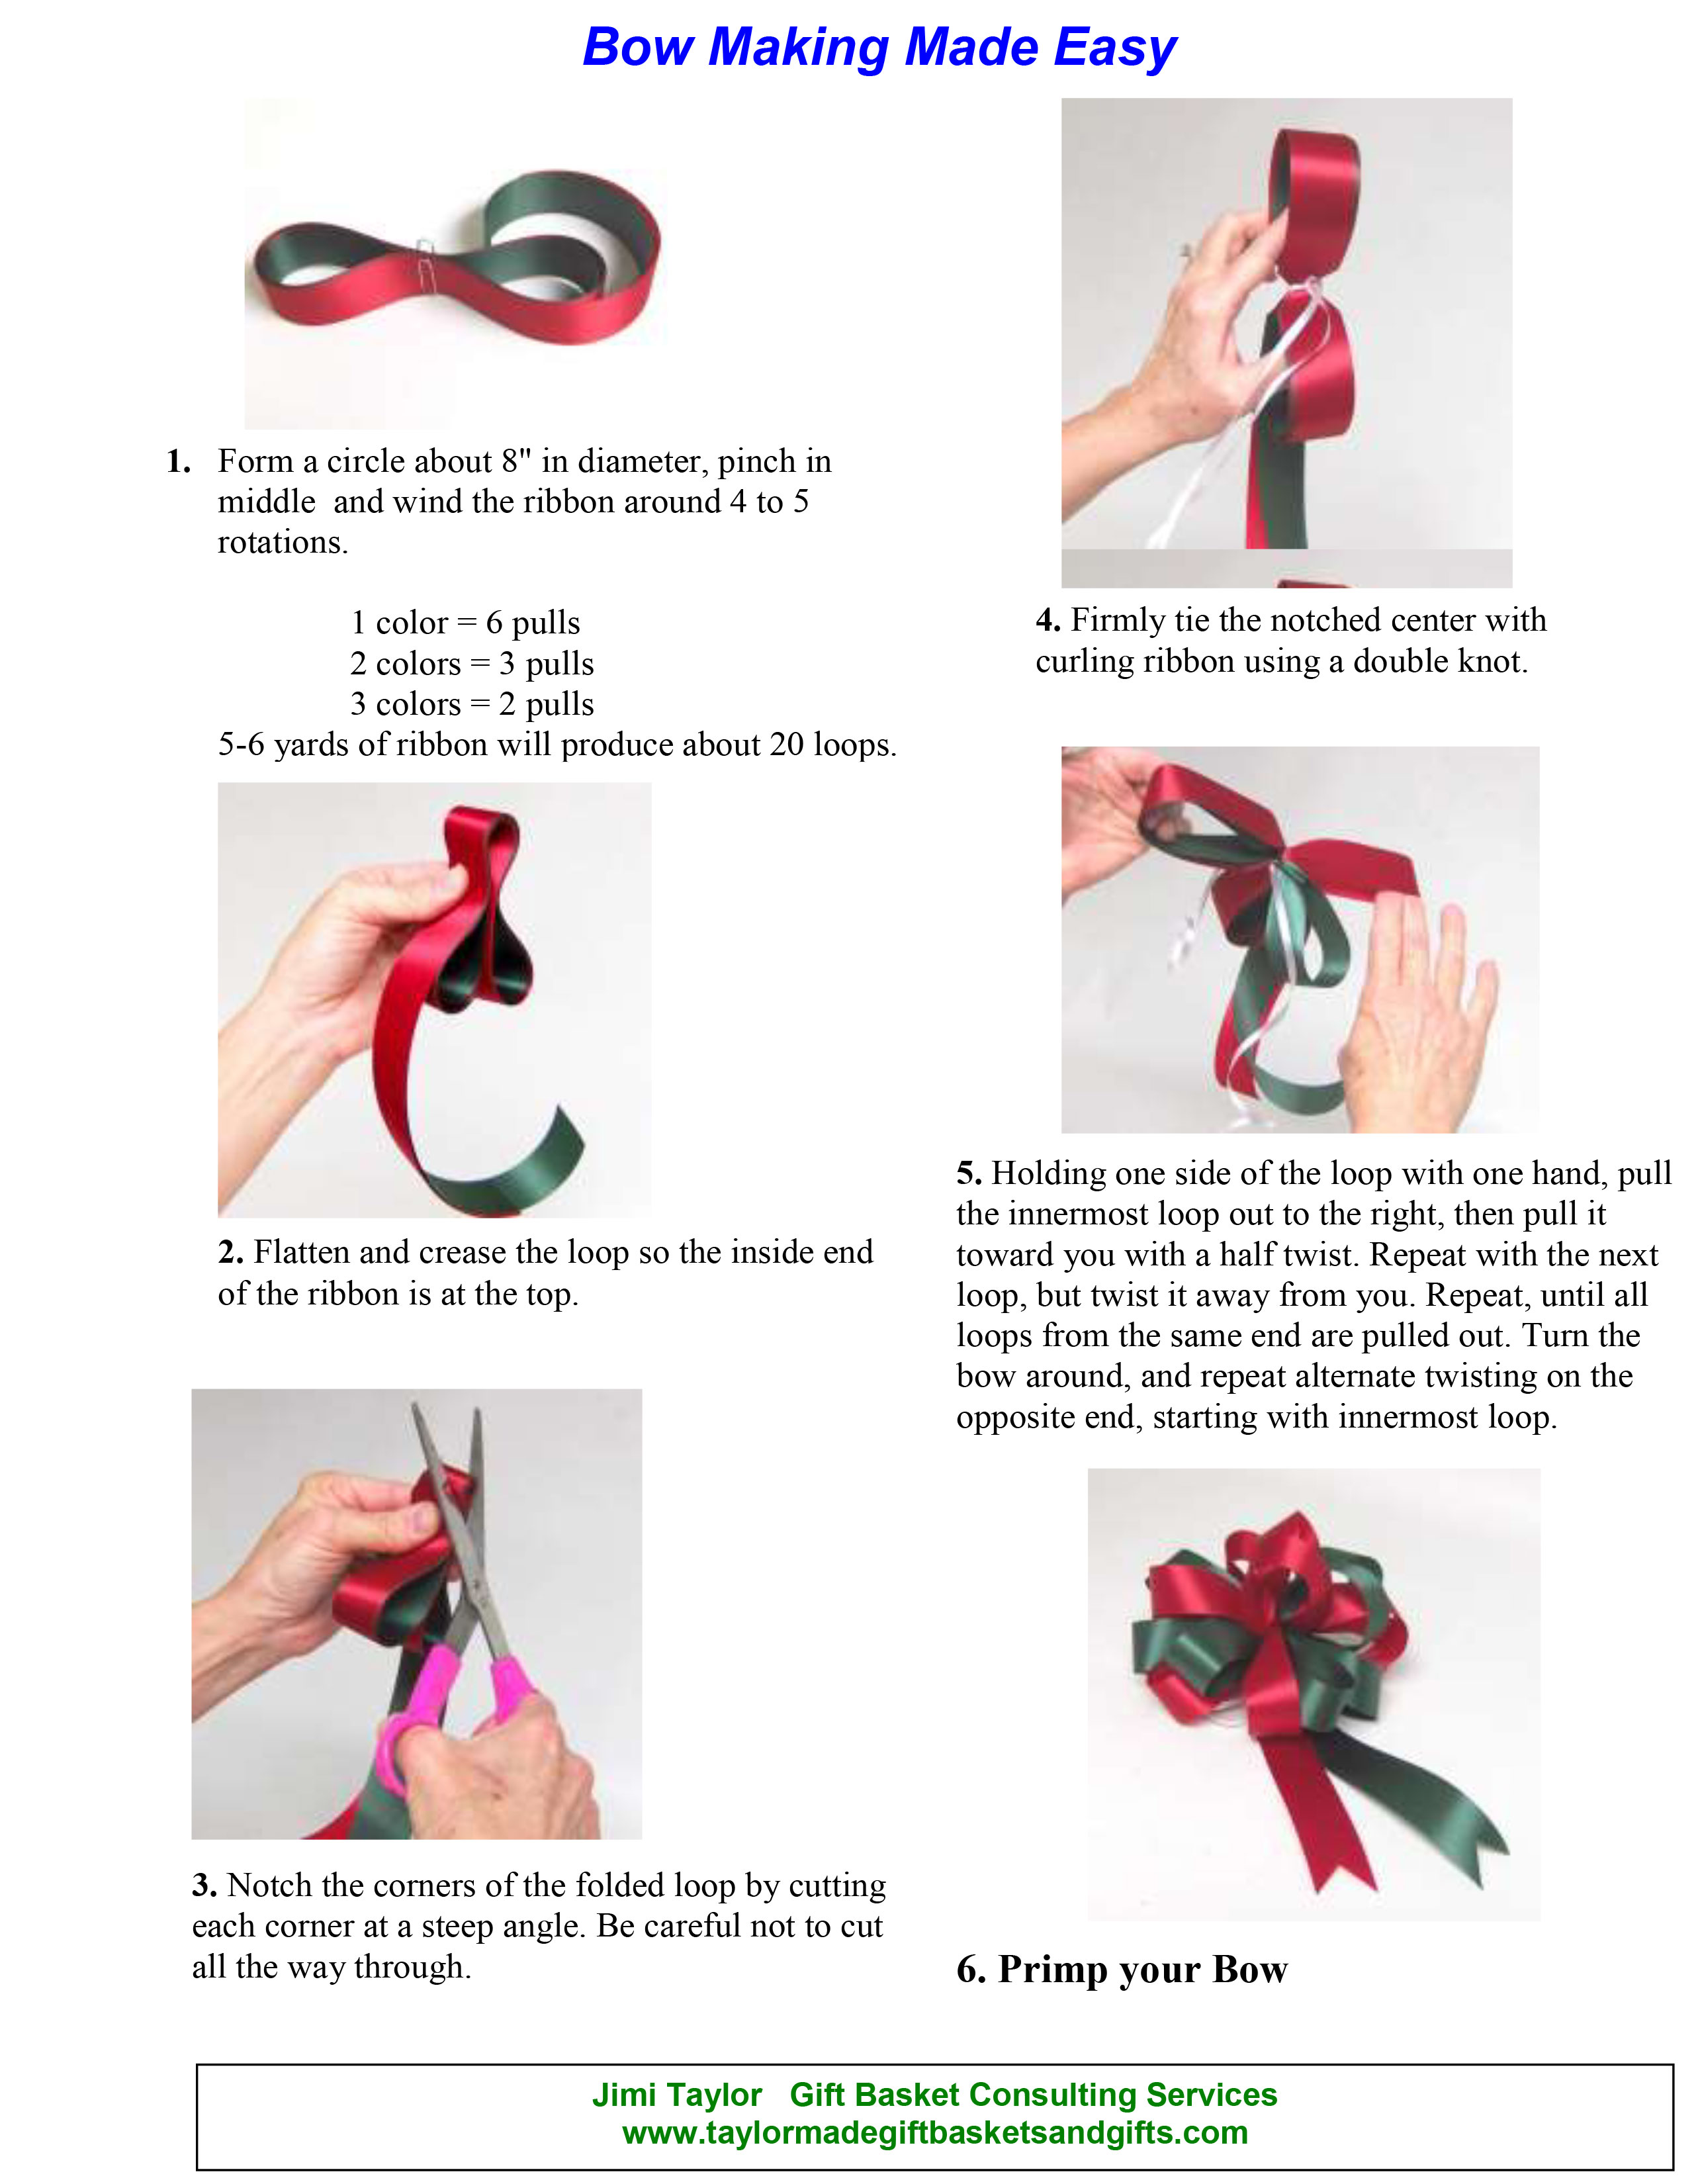
- Here is an instruction sheet created by our own Jimi Taylor that we published in one of the earlier issues of our magazine.